Spicy Asian Noodle Soup

Spicy Asian dishes are my favorite! Not the sickly sweet MSG laden ones, but home made, tasty ones.

You can use shrimp or chicken in this delicious recipe, but it can also be made vegan as well.

This recipe is simple, but with complex flavors. Start a day or more before the day you need it, because the broth IS the star of this show and we want it amazing! To make a really good stock, we need to draw as much flavor out of our ingredients as possible.

For your stock, use whatever veggies, you want. I usually keep all the tops and bottoms of my celery ribs, carrots and onions for this, as they get tossed in the end anyway. But, hey sometimes you have to use what you have. Really any veggies will work. Whether you are using chicken, shrimp or making it vegan, the stock starts the same way.

Shrimp shells and vegetables in a stock pot

Stock

  • large stock pot
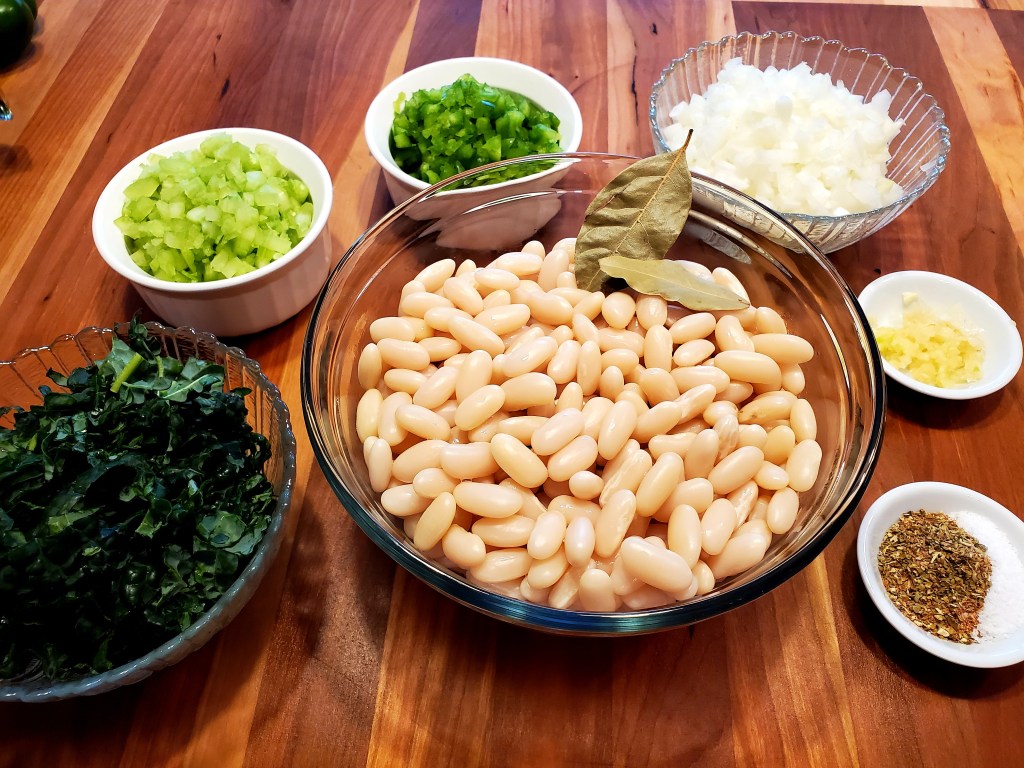
  • 6 to 8 cups veggies or clean veggie scraps (Carrots, celery, onion, cabbage, peppers etc.)
  • 10 to 12 cups water
  • Chicken, Shrimps shells or Dulse Flakes if Vegan.

Noodles
Noodles
  • Chicken: 4 thighs, skin on, bone in.
  • Shrimp: 1-1 1/2 lb raw shell on
  • Vegan: 2 Tbls Dulse Flakes

Ingredients

  • Noodles, Ramen, rice noodles, or spaghetti. (I talk about amounts below)
  • 3 cups Bock Choy (with bottom whites removed) collard greens, cabbage or kale coarsely chopped.
  • 4-5 mushrooms thinly sliced (optional)
  • 1 carrot (match sticks if possible, if not, thinly sliced)
  • 1/4 cup been sprouts Added at end. (Optional)
  • 2-3 cloves garlic, minced
  • 1 1/2-2 inches Ginger, grated
  • 1/2 tsp red pepper flakes
  • 1/4 cup soy sauce
  • 1-2 tsp Chili paste (I like Siracha’s chili paste for this) Optional
  • 2 Tbls Toasted Sesame oil
  • 1 lime divided
  • 1 green onion, thinly sliced (For topping, optional)
  • 2 Tbls Cilantro (For topping, optional)
  • 2 tsp Sesame seeds (For topping, optional)
  • Tofu cubed if desired

Directions (Serves 4)

THE STOCK: Make the stock a day or two ahead, this is optional, but well worth the wait, trust me. The flavors in the stock come together and become more pronounced if left the extra time. Now choose chicken, shrimp or Vegan. If you are choosing chicken you will need 3-4 Bone in thighs, yes, skin and bones. If you will be using Shrimp, 1- 1/2 lbs of raw shell on will do.

VEGAN: If you will be making this plant based you will use 2 TBLS of Dulse Flakes (Dried sea vegetable) and maybe some mushrooms. (Vegan dishes are notorious for lacking in Umami flavor, we will fix that) 🙂 If you can not find Dulse flakes at your local store, amazon has them. 4 Tbls of Miso is another ingredient that can be added to finished product to help with this as well.

Vegetables in pot
Braised Vegetables
The begining of chicken stock
Vegetables with chicken added
Chicken Stock
Stock getting ready to boil.

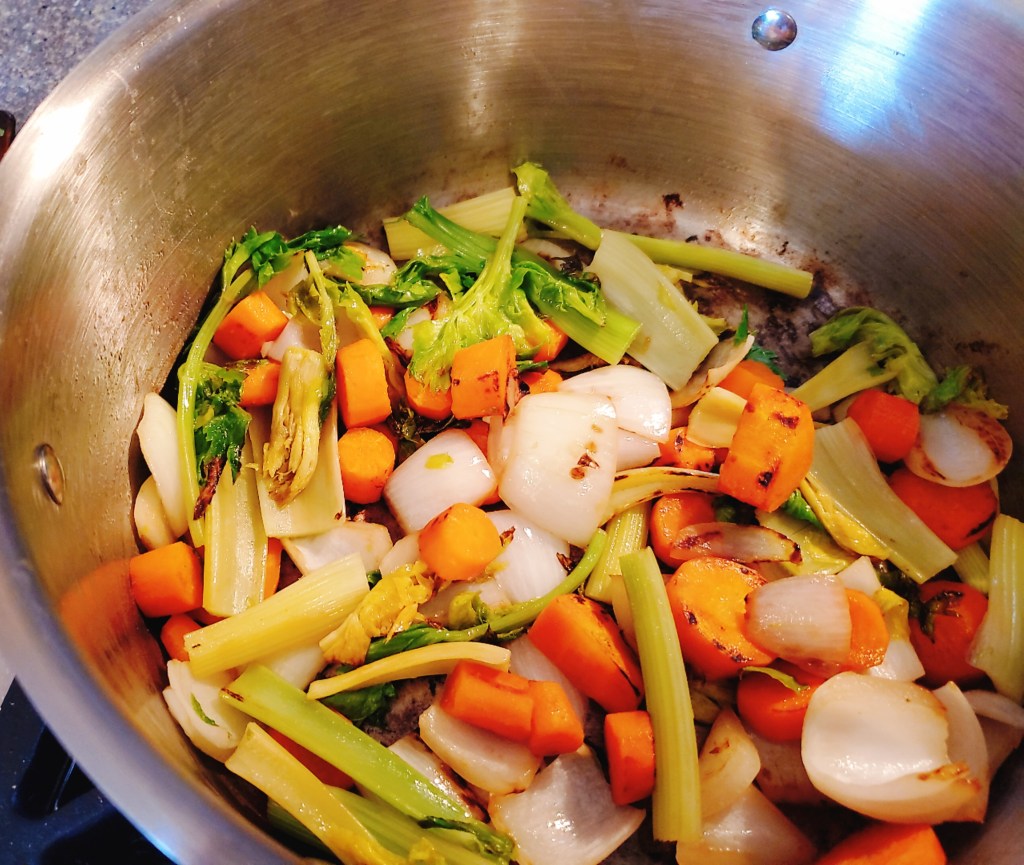
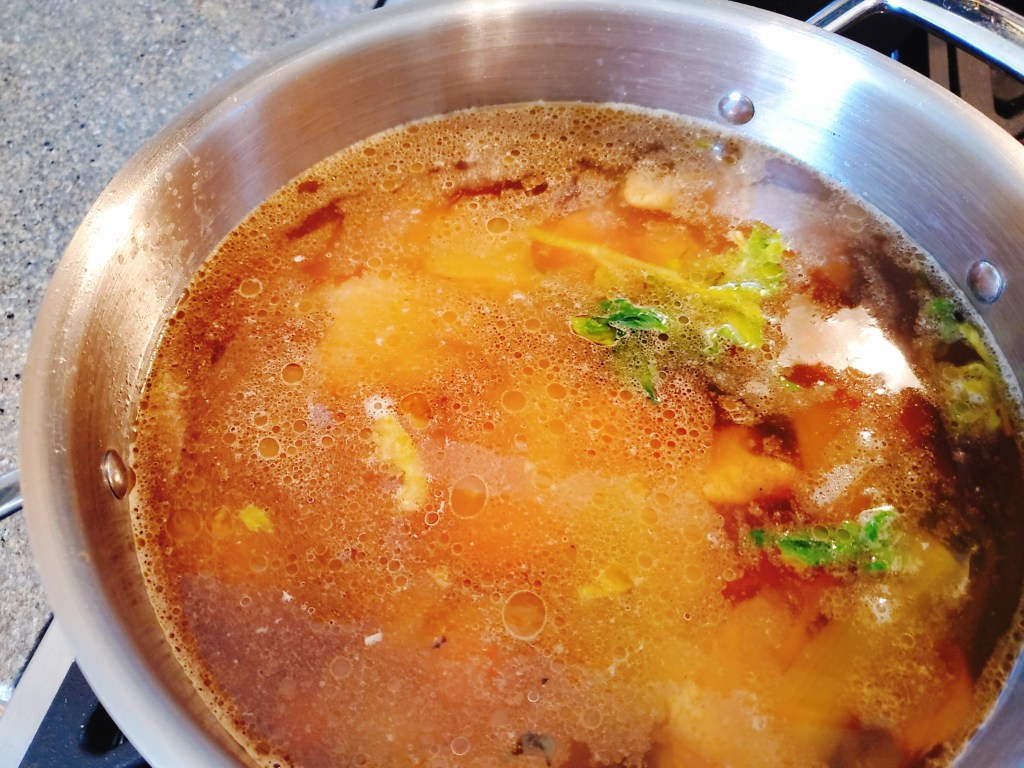
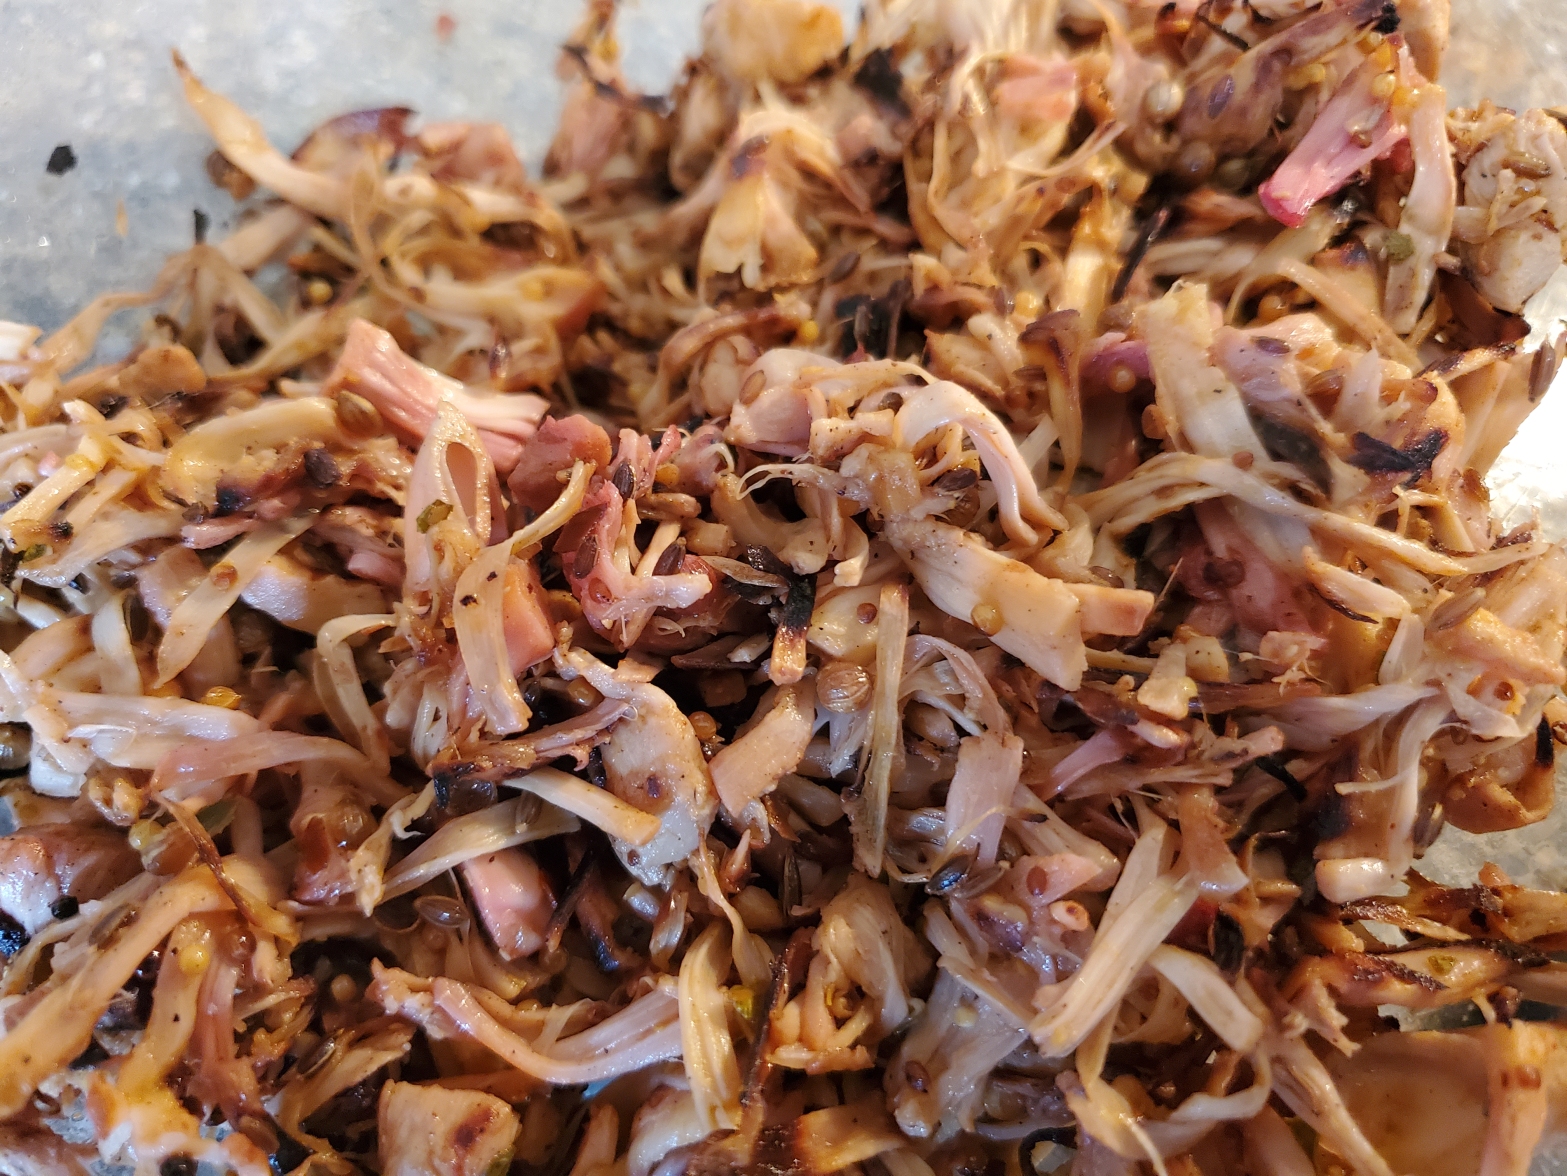
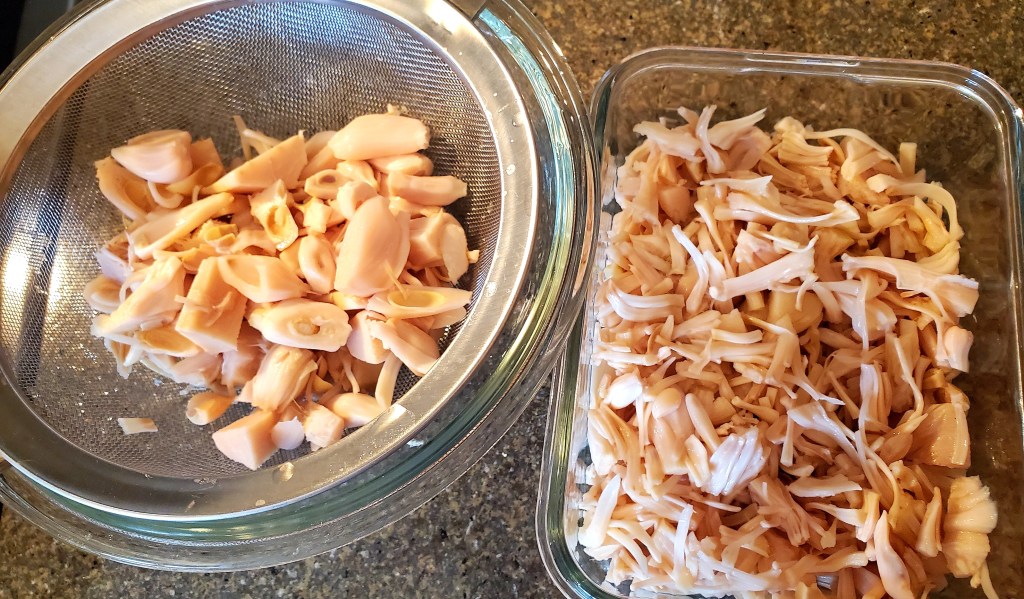
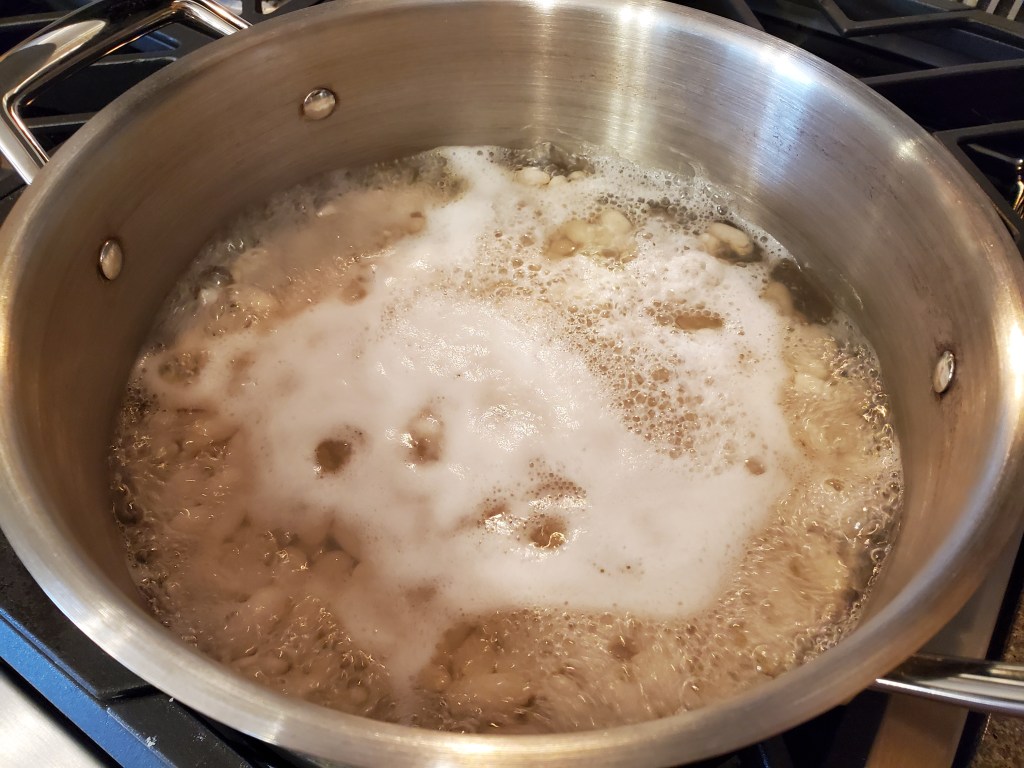
The stock starts the same with all the stocks. In a large stock pot, place 2 tbls oil of choice into pot. On medium heat cook all vegetables or veggie scraps. We are looking for dark edges and golden brown. This should only take 2-3 minutes. Stirring frequently. Do not over cook the vegetables, they should remain stiff. Once the edges of veggies are brown add a cup of water and de-glase the bottom of the pan. Then add your meat or Dulse flakes on top of the vegetables. Add 10 to 12 cups water, enough to well cover your ingredients ( You may be adding more through the cooking process) Cover and bring to a boil. Once boiling turn down and simmer 4 to 5 hours. Low and slow. Checking on it from time to time to see if it needs more water. When the 4 to 5 hours is up, (If using chicken remove thighs with a slotted spoon and allow to cool. Once cooled enough to touch, remove skin and bones and throw them back into pot, and bring back to a boil, then simmer. Cover the chicken and put in fridge.) The stock may taste a little bland at this point, but hold on, we will be adding the stronger flavors later. Please resist the urge to add salt. Simmer for an additional 2-3 hours, checking from time to time if it needs more water. Once the stock is finished, allow to cool a bit before placing it in the fridge overnight.

THE NOODLE SOUP: Let’s talk about the noodles. It really doesn’t matter what noodles you use. Just make sure to follow the directions for servings. (I like to make 5 servings for 4 people, because most people want a little more, and I want lunch tomorrow) For a more authentic feel I like Lotus Brand Rice ramen or Thai Kitchen white rice noodles, but you can even use spaghetti noodles if you like, they do take a bit longer to cook though. * Once the stock is boiling things move quick! Have things prepped and ready! Using a colander drain the liquid from the stock. Place the liquid back in pot and toss everything else. (Make sure you have between 10-12 cups of liquid. If not, add more water.) Add the minced garlic, grated ginger,red pepper flakes, soy sauce (chili paste if using.) and bring to a boil. While the stock is coming to a boil, make sure all your ingredients are prepped. Once stock has boiled for 5-6 minutes taste the broth for saltiness and adjust accordingly. Add the noodles and par-boil them. *Par-boil is not quite cooking the noodles all the way. Every noodle is different, so pull one out and try it. If it still has some stiffness to the center, but it they are separated, bendy and soft (Par-Boiled) It’s done. Add the tofu now if using. Add the Vegetables, and shrimp (if using) boil for 2-3 minutes? *Okay, here is the trickiest part. The noodles need to be done at the end, but not over done, and the veggies need to be blanched ONLY, but not cooked. ( I use a slotted spoon to remove the veggies if I think the noodles are taking longer, so that they do not become overcooked) Now add the bean sprouts and 2 cups of coarsely chopped chicken if using. Lastly, squeeze 1/2 a lime into noodle soup and stir. You’re ready to eat!

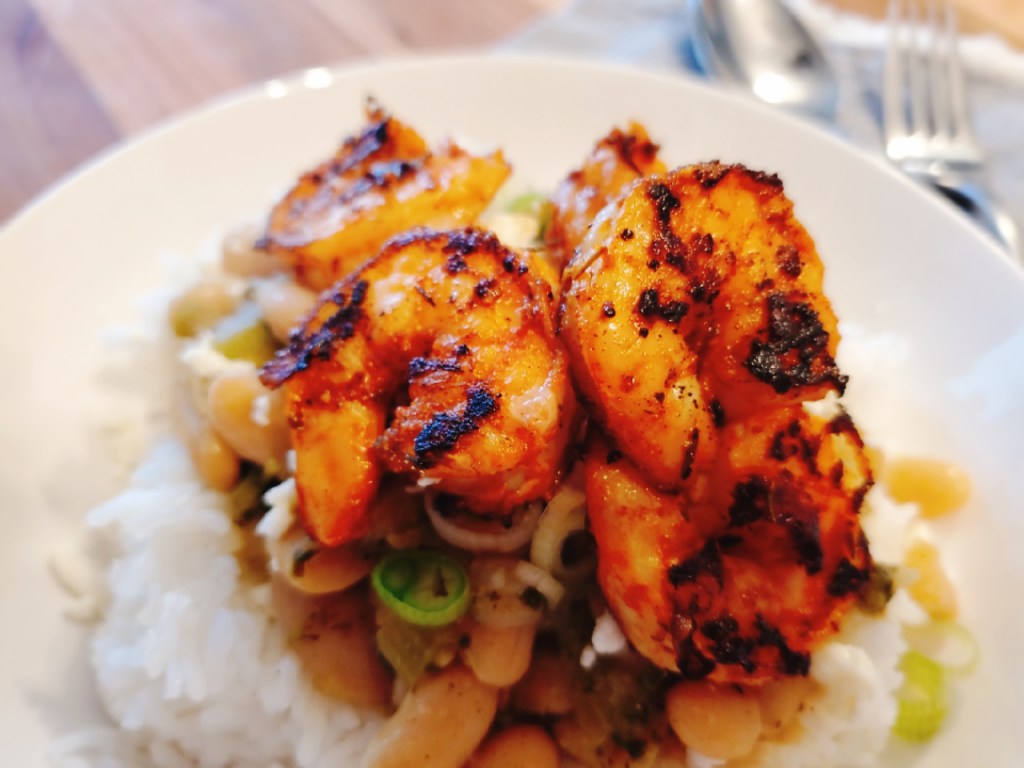
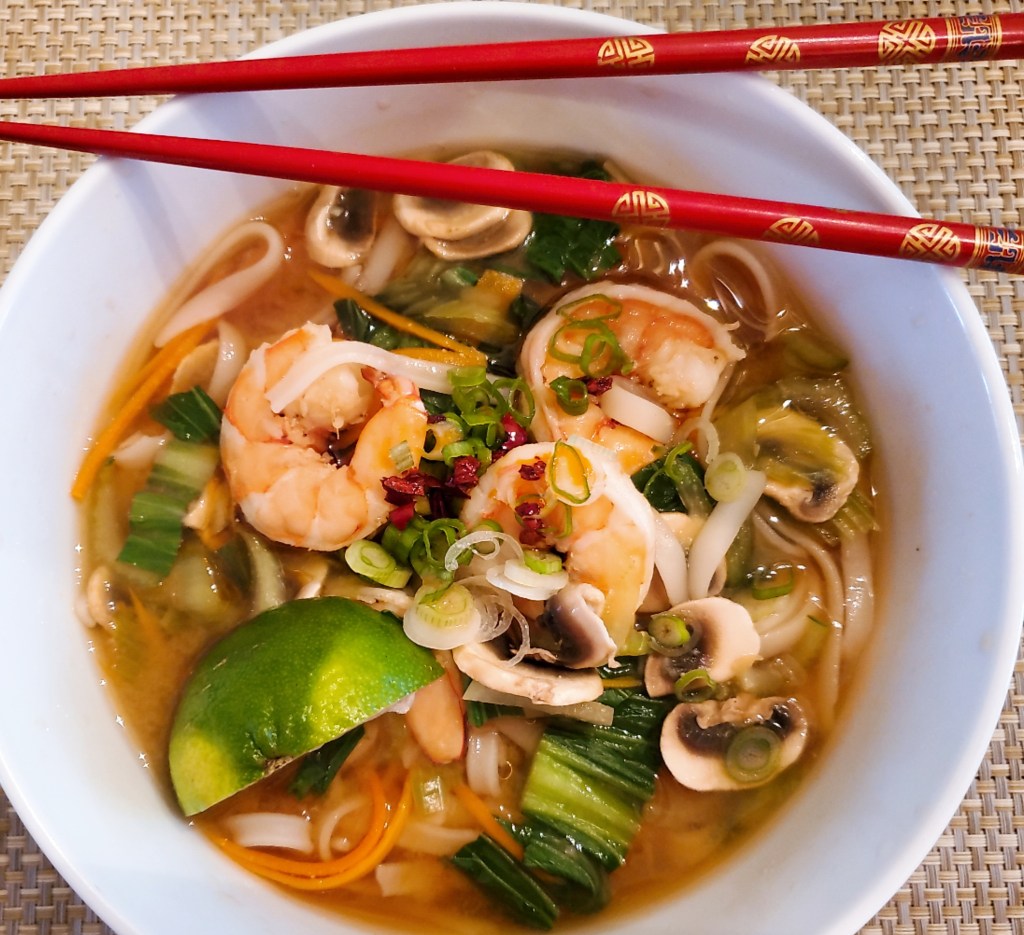
PLATING & SERVING: Plate the soup using large bowls. Using a pasta utensil, divide the noodles into 4 bowls. Pour broth over noodles. Add the meat, and veggies, then drizzle toasted sesame oil over it. Top with green onions, cilantro and sesame seeds if desired. Serve with chop sticks and a lime wedge. Make more sesame oil, soy sauce and chili sauce available to your guests. ENJOY!

Spicy Asian Noodle soup with chicken
Spicy Asian Noodle soup with shrimp

We have this Spicy Asian noodle soup often, because the recipe is so versatile and really easy once you have done it a time or two. Get creative with it.

Let’s Get Cooking!

Kristy

Best Naan Bread recipe

Home made warm Naan bread is just the best. Once you see how easy it is to make your own, you will be making it all the time.

Serve Naan bread, with curries, soups or hummus. or make a sandwich! 🙂 Naan is very versatile. This recipe can be made vegan or not.

Ingredients

  • 1/2 warm water (Just warm to the touch)
  • 2 tsp active or instant yeast
  • 1 tsp sugar
  • 3 Tbls oil of choice
  • 1/4 plain yogurt or Vegan alternative
  • 1 egg (room temp) or vegan alternative (may omit)
  • 1/2 tsp salt
  • 2 1/2-3 cups all purpose flour
  • 2 Tbls melted butter or vegan alternative (optional)
  • 2 tsp minced or 1/2 tsp granulated garlic (optional)
  • 1/2 tsp parsley (optional)

Directions

Combine warm water, sugar and yeast in a large bowl, or a bowl of a stand mixer and stir. Let sit for 5 to 10 minutes, just until it is foaming a bit.

Add oil, egg, yogurt 2 cups of flour and salt. Mix until smooth. Add enough remaining flour to make a soft dough. It will be sticky, but should not stick profusely to your finger when touched. Knead in stand mixer for about 5 minutes until a smooth dough forms, or kneed by hand for 10 minutes.

Place dough in a greased bowl and cover. Let rise in a warm place until doubled.

Once dough has doubled, heat a heavy skillet (like cast Iron) to medium.

Cut or weigh dough out into 8 even pieces. On a floured surface, roll out each piece one at a time into a circle (or close to it)

Using an oily paper towel, oil the bottom of skillet, do this between each Naan. Cook on each side 2-3 minutes. Checking to see color beneath. If it is burning turn the heat down, if it is taking to long, turn the heat up.

When all Naan bread is cooked, combine the melted butter, garlic and parsley. Brush this on the tops of the Naan. Serve warm.

It’s not just for hummus. This recipe is my go to for any curry, lentil dish, and many soups or stews.

I hope you enjoy this recipe and use it often.

What are you waiting for, Let’s Get Cooking!

Kristy

African Peanut Stew (vegan)

As you may have noticed, quite a few of my recipes are spicy. And this recipe is no exception. You can control the amount of heat you use though.

You can choose what sides you want to serve with it, but I like to use rice and home made Naan bread (recipe here) Naan bread is easier than you think to make and soooo good. Make this earlier in the day.

Let’s start by prepping all the ingredients. Wash, pat dry and prepare (chop,dice or grate) all the produce. Measure out all Dry ingredients and set aside. Measure out all the remaining ingredients and set aside. (If you can, use fresh organic produce. Not only is it better for you, but tastes better than it’s conventionally grown counterpart.)

  • 1 1/2 lb sweet potato (about 1 large ) Chopped.
  • 2 cups loosely packed kale or collard greens (torn or roughly chopped)
  • 1 medium onion (thinly sliced)
  • 2-3 cloves garlic (minced)
  • 1″ Ginger (peeled and grated)
  • 1-14 oz can diced tomatoes
  • 1-14 oz can light red kidney beans
  • 1/2 cup peanut butter (Either)
  • 2 Tbls tomato paste
  • 4 cups vegetable broth
  • 2 Tbls oil of choice
  • 1/2 tsp salt
  • 2 tsp cumin
  • 1 tsp coriander
  • 1/4 tsp cinnamon
  • 1/4-1/2 tsp cayenne (Optional)
  • 1/4-1/2 tsp red pepper flakes (Optional)
  • Roasted Peanuts for garnish
  • Cilantro (chopped) for garnish
  • Lime for serving

This meal doesn’t take long, so start your rice. Next, saute’ the sliced onion in oil until translucent, about 5 minutes. To the onion add the minced garlic and grated ginger and saute’ an additional 60 seconds. Add the chopped sweet potato, chopped kale and spices. Stir to coat completely. Saute’ for another 3-4 minutes, then add the diced tomatoes, beans, vegetable broth, peanut butter and tomato paste. Stir till combined. Bring to a boil and cook for 15 minutes.

Sauteing vegetables for stew
African stew after adding all ingredients.
completed African peanut stew

Plate the stew along side rice, or place a packed cup of rice on top of stew. Garnish with chopped roasted peanuts and cilantro. Serve with a wedge of lime and warm Naan bread.

Plated African Peanut stew with rice and Naan bread

I hope you enjoy this recipe. It is quick and easy to make. This is a perfect meal to make for anyone, plant based or not!

Let me know how you like it, and as always, Let’s Get Cooking!

Kristy

Corned Jackfruit (Vegan Cornbeef)

Corned jack fruit is much like corned beef. It is used in Gardener’s Pie (Vegan Sheppards), sandwiches, corned beef hash, but really you can use it where ever you like.

I use canned young Jackfruit. There are many varieties out there to chooses from. You can even use the Jackfruit that comes in a box or bag, just make sure it’s young and at least combine weight of

Can of young Jackfruit

To start with round up your ingredients and 2 bowls.

Ingredients:

  • 2 cups water
  • 2 tsp Kosher salt
  • 2 Tbls brown sugar
  • 1 Tbls Vinegar (I like red or white wine, but you can use any)
  • 1 Tbls soy sauce
  • 1/2 tsp liquid smoke
  • 2 Tbls pickling spice
  • 2 bay leaves

  • 2-20oz cans of YOUNG Jackfruit in water or brine. NOT ripe Jackfruit in syrup!
  • 1/4 smoked paprika (For color and flavor)

First (Very Important) put the pickling spice in cheese cloth or an herb bag used in cooking and make sure it’s sealed, or you will be picking the pickling spice out of the finished product for hours. 😦

Next put all the brine ingredients (first 9) into a small pan. Bring mixture to a boil. Once boiling, turn off heat and start on the Jackfruit.

Open and drain the 2 cans of Jackfruit. Using your fingers, shred the Jackfruit. Discarding any hard triangular points and pods. (Pictured below)

Peices of Jackfruit
Drained Jackfruit
Shredded Jackfruit and discarded segments
Discarded tips and pods & Jackfruit Shreds

Place Jackfruit shreds into a container with a lid and cover with prepared brine. (Make room for that bag of pickling spice) Cover and refrigerate overnight and up to 2 days.

brine covered shredded Jack fruit.
OOPS! Fogot the spice bag, guess what I will be doing?! 😦

Next day, drain Jackfruit and remove Pickling spice bag and Bay Leaves. Allow to drain well.

In the mean time, heat some oil in a skillet over med heat. Add shreds of Jackfruit. Sprinkle the Jack fruit with paprika and incoperate into Jackfruit to color. Cook until slightly crispy.

Now your Corned Jackfruit is ready for your dish, whatever it may be.

I hope you really do make this recipe. Try it on a sandwich or hash, delish!

Let’s Get Cooking!

Kristy

Finished corned Jackfruit
Corned Jackfruit

Spicy Cilantro Lime Aioli

This Aioli Dressing is delicious and very versatile. use it on tacos, enchiladas, nachos salads and more! Get your creative juices flowing, where can you use this?

Ingredients:

  • 3/4 cup Oil of choice ( I use Avocado or sunflower)
  • 1/2 cup rinsed and dried chopped and packed cilantro
  • 1 jalapeno
  • 1-2 garlic clove

  • Juice of 1 lime
  • zest of 1 lime
  • 1/4 tsp salt
  • 1/4 pepper
  • 1/2 tsp onion powder
  • 1/4 paprika
Ingredients for aioli

Collect all your ingredients, wash and dry the cilantro and jalapeno. Cut jalapeno and remove seeds. Chop cilantro.

Place all ingredients in a blender or food processor and process until smooth and creamy. It is okay to see specks of green 🙂 Pour into container, cover and refrigerate for at least 2 hours before using.

I put mine into one of those plastic squeeze condiment bottles so I can easily apply and make my dish presentation beautiful!

I hope you enjoy this recipe and as always, Let’s Get Cooking!

Kristy

Seitan Sausages (Vegan)

Who doesn’t love a good sausage? Like many of you, my husband and I do not eat pork, which is the main ingredient in most sausages. I love to cook, and eat so I had to come up with an alternative.

Sietan is made from wheat gluten. Another name for it is, wheat meat. It’s kinda cool how it does resemble meat in texture and consistency, and you can season it however you want.

Seitan is pretty easy to make and freezes nicely. You can make a recipe and use it for a few months. In an earlier post I shared how to make Seitan Italian sausage crumbles, and in this post I share how to make long, tubular sausages.

The amount of Vital wheat gluten is the same for all sausages, the only difference will be the seasonings and other ingredients. I like to make several different sausages at a time and freeze them for later use.

We will go over the base recipe and the directions on how to prepare the sausage. I will provide you with four different recipes for the most popular sausages.

  • Italian
  • Chorizo
  • Breakfast
  • Pepperoni
Breakfast Sausage

Breakfast Sausage

  • 1 1/2 cups Vital wheat gluten
  • 2 Tbls nutritional yeast
  • 1/2 tsp garlic powder
  • 1/2 onion powder
  • 1/2 tsp dried oregano
  • 1/2 tsp thyme
  • 1 tsp rubbed sage
  • 1 1/2 tsp fennel seeds
  • 1/2 tsp smoked paprika
  • 1/2 tsp pepper flake
  • 3/4 tsp kosher salt
  • 1/2 tsp black pepper
  • 1 1/4 cups vegetable stock or water
  • 1 tsp tomato paste
  • 1 Tbls soy sauce
  • 2 Tbls oil of choice
  • you can add a tbls or two of maple syrup if you prefer, I don’t.

Italian Sausage

  • 1 1/2 cup Vital wheat gluten
  • 2 Tbls nutritional yeast
  • 1 Tbls dried basil
  • 2 tsp fennel seed
  • 1 tsp dried rosemary
  • 1 tsp garlic powder
  • 2 Tbls dried onion
  • 1/2 tsp red pepper flake
  • 3/4 tsp salt
  • 2 Tbls oil of choice
  • 3/4 cup vegetable broth
  • 1/4 sun dried tomatoes in oil diced
  • 1/4 tsp liquid smoke (optional)

Pepperoni

  • 1 1/2 cups vital wheat gluten
  • 2 Tbls Nutritional yeast
  • 1 Tbls fennel seed
  • 1 Tbls garlic powder
  • 1 Tbls smoked paprika
  • 2 tsp red pepper flakes
  • 1 tsp salt
  • 1/3 cup tomato paste
  • 1/3 cup soy sauce
  • 1/4 cup oil of choice
  • 1/4 vegetable broth or water

Chorizo Sausage

  • 1 1/2 Vital wheat gluten
  • 2 Tbls nutritional yeast
  • 2 tsp cumin
  • 2 tsp smoked paprika
  • 1 tsp garlic powder
  • 1 tsp onion powder
  • 2 Tbls chili powder
  • 1/2 tsp cayenne pepper
  • 2 tsp red pepper flakes
  • 1 tsp salt
  • 1/3 cup tomato paste or ketchup
  • 3/4 cup vegetable broth or water
  • 3 Tbls oil of choice

The first thing you need to do is gather your ingredients together and have them measured out.

Next you want to get a pot with a steamer basket. I use a large one.

Fill the pot with a few inches of water and set it to boil. Next, in a large bowl add all the dry ingredients and whisk together. In another bowl whisk together all the wet ingredients. When well whisked, add the wet ingredients to the dry while stirring. Mix until it will no longer mix.

Dry & wet Ingredients
Seitan sausage
Pepperoni
Breakfast Sausage

See how the gluten becomes tight and stringy.

Now roll the mixture into log shapes. You can do 1, 2, 3 or 4. I use 1 for breakfast sausage, because I want a large sausage to slice and fry, 2 or 3 for Chorizo, 3 for pepperoni and Italian, because I want to slice the pepperoni into smaller circles and chopor slice the Italian for other dishes. I use 4 if I will be serving them on a bun.

Next, roll some parchment paper around the log to make it into a tight roll. then wrap aluminum foil around it and seal ends.

Make sure the water is boiling in your pot, then place the Seitan sausage/sausages into the top of the steamer basket. Cover and allow to cook. 1 large sausage cooks for 45-50 minutes, 2 sausages for 40-45 minutes and 3 & 4 sausages cook for 30 to 35 minutes. Once done, carefully remove them from steamer basket.

Steamed Pepperoni
Finished Pepperoni
Finished Breakfast sausage

Once cooked allow to cool and unwrap. If you will be using the sausages sliced, do it now. Wrap and freeze any unused Seitan for future use. If refrigerating, make sure to cover completely (wrap) Seitan will stay in the fridge for up to a week.

Now that you have sausages, Let’s get cooking!

I hope you enjoy making and eating these sausages. Let me know in the comments below what you made with yours!

Cheers, Kristy

Cheese Filled Herbed Pretzels

Making homemade pretzels are easier than you think. If you have made any yeast bread, and even if you haven’t, give this a try. I promise once you’ve tasted a home made pretzel you will be making them often.

You can use any herbs and cheeses you want, but my favorite combinations are Basil/Mozzarella & Parmesan or fresh Rosemary (Pictured here) and those same cheeses. But you can also use Italian seasoning. I like to use those cheeses not just for the flavor, but the melt. But please use what ever you have on hand. If you don’t want cheese filled, you can just make herbed or plain pretzels with this recipe.

WHAT YOU”LL NEED:

For Dough:

  • 1 1/2 cups a little warmer than room temp water (between 75-80°)
  • 1 Package or 2 1/4 tsp active dry or instant yeast
  • 1 1/2 tbls sugar (yes, you need sugar for many reasons)
  • 2 tsp dried herbs or 2 Tbls fresh Rosemary (not dried)
  • 4 1/4 cups Organic all-purpose flour
  • 6 tbls unsalted butter softened (Not melted)

Cooking Liquid: 10 cups water & 3/4 cup baking soda

Filling:

  • 2 cups grated Mozzarella cheese (please grate your own. You’ll thank me)
  • 1/2 cup Parmesan Cheese

Toppings:

  • Egg Wash: 1 egg, 1 tbls water beaten
  • Grated Parmesan, herbs, melted butter, garlic powder, course salt. (All of these are optional. Let your creative juices flow, or keep it simple and only use course salt)

Directions: For the dough: 1. Combine water yeast and sugar in bowl of stand mixer. let sit for 10 minutes or until it’s starts to get foamy. 2. Add the flour, salt and butter and any herbs you are using. Knead on med for about 10 minutes. (dough should be smooth and have pulled away from the sides of the bowl)

3. Cover the bowl and let dough rise till almost doubled in size (Almost, because we still want a little rise left in the dough) About an hour. (you can use your oven with the light on for this. I have noticed it is about the right amount of heat. No heat, jut the light) 4. Meanwhile combine the cheeses in a bowl and refrigerate until needed. 5. Preheat oven to 425° 6. Line 2 large baking sheet with parchment paper and set aside. 7. Add the water and baking soda to a large pot and bring to a boil.

8. Divide dough into 8 equal portions. 9. One at a time, use your hands to roll each dough portion into a 16′ rope, then roll flat to 4″ wide. (Piece should end up being 16″ long x 4″ wide.) 10. Add about 3- 3 1/2 tbls cheese along the edge and length of each piece, leaving about 1/2 inch space between edge of dough and cheese. (pictured here.)

11. Tightly roll the rope up, starting on the long side. Tucking the edges so that no cheese escapes. 12. Make a U shape and cross the ends over and pinching them to the bottom of dough. 13. Lay each pretzel on the lined cookie sheet. (Continue with this process until all 8 portions are a pretzel.) 14. One at a time, boil the pretzels in water for 30 seconds each.

15. Remove the pretzels from water with slotted spoon or spatula. Drain a bit and place back on lined baking sheet. 16. Once all pretzels have been boiled, brush the tops with egg wash and sprinkle with a little course salt. 17. Place in preheated oven and bake 16-18 minutes. allow to cool a bit before serving.

Cheese filled pretzel cut open

You can make these the main dish, served with a salad, or as a snack. I like to serve these particular pretzels with garlicky marinara, but you can serve them with any dipping sauce you choose, or just as is. Here are some ideas for dipping sauces. Beer & Cheese, Ranch or Honey Mustard.

I hope you enjoy this recipe, and as always…..LET”S GET COOKING!

Kristy

Louisiana Style Cajun White Beans with Blackened Shrimp over Rice (Spicy)

Not everyone likes spicy, so if this is you, pass this one by or take a walk on the wild side and give it a try. This recipe can be made Vegan and serves 6-8 people

IMPORTANT! You will want to prep your shrimp the day before you want to make this. Let’s talk about the shrimp for a second. I like to use large wild caught because they just taste better, but understandably, most will have to use another. But regardless, try to get the largest you can. Where I live it is hard to get fresh, so I do buy frozen and thaw it ahead of time. (If using shrimp, keep shells to make stock)

This recipe can be made vegan or made with blackened chicken, beef pork or fish (This includes lobster. I will be trying this soon.), or heck, just grill an Andouille sausage and lay it on top! You are the boss of your kitchen! If making vegan, just leave the meat out or add alternative meat/sausage after it is cooked.

The white bean is up to you as well. You can use Navy, Great Northern, Lima or Cannellini. My personal favorite to use for this recipe is Cannellini, because they are larger, firmer and buttery.

INGREDIENTS:

  • 1 lb large Raw Shrimp peeled & deveined
  • 2 lbs dry white beans
  • 1 med/lg onion finely chopped
  • 1 green pepper finely chopped
  • 4 leaves kale rib removed and roughly chopped.
  • 2 ribs celery finely chopped
  • 2 cups Broth or Stock (Depending on if you’re making it Vegan or the protein you are using.
  • 2 cups long grain white rice

  • 4 Cloves minced garlic
  • 4 tsp Cajun seasoning (make your own here)
  • 2 bay leaves
  • 1/4 tsp oregano
  • 1 tsp salt
  • 1/2 tsp pepper
  • 1/4 cup white Miso paste
  • 5- 5 1/2 tsp Blackened seasoning for Shrimp. (make your own here)
  • Optional Items: Green onions, Cotija or Feta cheese for topping. Butter & Soy sauce

COOKING DIRECTION:

PREP WORK: (IF YOU ARE USING FROZEN SHRIMP) Plan on one day to defrost, day 2 to marinate (You can skip this step, but I don’t recommend it.) and day 3 eat! If you are using fresh shrimp skip the defrost day. DAY 1 defrost shrimp.

Peeled shrimp

DAY 2: Peel (keep the shells refrigerated untill ready to make stock.) and devein your shrimp. Devein shrimp by first peeling it, and then with a sharp knife make a shallow cut along the length of it’s spine. Using the tip of the knife or your finger remove the intestine vein. (Do I need to devein? Well, that’s up to you, but the vein is referring to the crustaceans poop shoot, so if you don’t want to eat poop, yes!) Rinse the shrimp and pat dry. Drizzle shrimp with 1 tbls oilve oil, then sprinkle with 5-5 1/2 tsp blackened seasoning and mix till all shrimp are coated. Cover and refrigerate over night. Sort and rinse the beans. After rinsing, cover with water and allow to soak overnight.

Boiling beans

Day 3: Chop all veggies and get your seasonings ready. Measure out your stock/broth. (if using shrimp, boil the shells removed earlier in about 2 1/2-3 cups water for about 15 minutes. Next, par- boil the beans. (It de-gasses them) You can skip this step if you don’t mind the gas. Simply add the beans to a pan and cover with about 2 inches of water. Bring to a boil and boil for 5-7 minutes. you will see white foam developing as pictured Above. Spoon off the foam. Then drain and rinse thoroughly.

Add the beans, all the vegetables, seasonings Miso, 2 cups of stock/broth and salt to the pot of your pressure cooking device. (Following all manufactures guidelines) Cook on the bean/chili function, choosing the longest cook time. While the beans are cooking, you can make the rice. When beans are finished, allow to cool for about 10 minutes. following your devices instructions, use the quick release function to remove the steam/pressure. BE CAREFUL, it’s HOT! Carefully remove lid. Remove the Bay leaves. With a potato masher or the back of a large spoon or ladle, mash about 1/3 to 1/2 of the beans. Stir to combine. Now lets cook the shrimp!

cooking blackened shrimp

Heat a heavy skillet until it is hot, smokin’ hot (med-high)(I use cast iron, but you can use what ever heavy skillet you have.) Place marinated shrimp a few at a time in skillet . Don’t overcrowd. Cook on both sides for about 2 minutes. What you are looking for is a nice dark, burnt coloring. Don’t over cook your shrimp, they cook really fast and you don’t want them tough. When each batch is done, place aside until all the shrimp have been cooked.

SERVING: Scoop out some rice and place in the bottom of shallow bowl or plate. (At this point I like to put a dollop of butter on the rice) Next, scoop some of the beans on top of the rice. add the Blackened shrimp to the top of the beans and top with green onions and Cotjia cheese. Serve with corn bread or warm tortillas. You may have left overs. I like to reheat it the next morning topped with an egg.

ENJOY!

I hope you enjoy this recipe, you can tailor it to your tastes. If you make it, let me know your thoughts. Let’s get cooking! ~Kristy

Blackened Seasoning

Making your own not only tastes better, but saves money and waste!

You can use this seasoning on fish, shrimp, lobster, chicken, beef or pork. When making your own seasoning blends, try and buy organic spices and here’s why.

Ingredients: 1 Tbls paprika, 2 1/2 tsp salt, 1 tsp garlic powder, 1 tsp cayenne, 1 1/2 tsp black pepper, 1/2 tsp dried thyme and 1 tsp dried oregano.

whisk all the ingredients in a small bowl and store in small air tight container.

Sources: Organic Valley

Cajun Seasoning

Making your own seasoning blends, not only tastes better, but saves you money!

This combination of herbs and spices is great to use in any dish asking for Cajun seasoning or if you are making something a little spicy. (If you don’t like it to spicy, reduce the cayenne to 1 1/2 tsp) Try to buy organic and here is why.

Ingredients: 3 Tbls Paprika, 2 Tbls fine sea salt, 2 Tbls garlic powder. 1 Tbls fine ground pepper, 1 tbls onion powder, 1 tbls dried oregano, 1 Tbls cayenne and 2 tsp dried Thyme.

Sources: Organic Valley